Preparing for Installation: Essential Steps and Considerations
Surface Preparation and Cleaning
Before installing flexible LED neon flex, it's imperative to prepare the mounting surface thoroughly. Start by cleaning the surface with a mild detergent and water solution to remove any dirt, dust, or grease. For stubborn residues, use isopropyl alcohol to ensure a pristine surface. Allow the area to dry completely before proceeding with the installation. Next, inspect the surface for any irregularities or damage. Smooth out any rough spots and repair any cracks or holes to create an even surface. This step is crucial for ensuring proper adhesion and preventing potential damage to the LED neon flex during installation.
Measuring and Planning Your Layout
Accurate measurements are key to a successful installation. Use a tape measure to determine the exact length of flexible LED neon flex required for your project. Add a small buffer (about 10%) to account for any adjustments or errors during installation. Create a detailed layout plan, marking the placement of the LED neon flex, power supplies, and any corners or bends. This will help you visualize the final result and identify any potential issues before beginning the installation process.
Gathering Necessary Tools and Materials
Assemble all the tools and materials you'll need for the installation. This typically includes:
- Flexible LED neon flex
- Mounting clips or channels
- Power supply
- Wire strippers
- Scissors or a sharp utility knife
- Screwdriver
- Drill (if needed for mounting)
- Silicone sealant (for outdoor installations)
- Electrical tape
- Safety glasses and gloves
Having all these items ready before you start will streamline the installation process and minimize interruptions.
Installation Techniques for Flexible LED Neon Flex
Mounting Options and Best Practices
There are several mounting options for flexible LED neon flex, each suited to different applications and surfaces. The most common methods include:
- Mounting clips: These plastic or metal clips securely hold the neon flex in place and are ideal for straight runs.
- Aluminum channels: These provide a sleek, professional look and offer additional protection for the LED neon flex.
- Adhesive backing: Some LED neon flex comes with a pre-applied adhesive strip for easy installation on smooth surfaces.
When installing, ensure that you space the mounting clips or channels evenly along the length of the LED neon flex, typically every 12-18 inches. This prevents sagging and maintains a uniform appearance.
Cutting and Connecting LED Neon Flex
Most flexible LED neon flex can be cut to custom lengths, but it's crucial to cut only at designated points marked on the product. Use sharp scissors or a utility knife to make clean, straight cuts perpendicular to the length of the strip. After cutting, seal the end of the LED neon flex with the provided end caps or silicone sealant to maintain its water-resistant properties. When connecting multiple sections, use the appropriate connectors and ensure a secure, watertight connection.
Bending and Shaping Techniques
One of the key advantages of flexible LED neon flex is its ability to bend and conform to various shapes. However, it's important to respect the minimum bending radius specified by the manufacturer to avoid damaging the internal components. When creating curves or bends, gently manipulate the neon flex by hand, allowing it to naturally conform to the desired shape. Avoid sharp bends or kinks, as these can damage the internal LED strips or affect light distribution.
Power and Control Considerations
Calculating Power Requirements
Proper power management is crucial for the longevity and performance of your flexible LED neon flex installation. Calculate the total power consumption by multiplying the wattage per meter by the total length of LED neon flex used in your project. Select a power supply that can handle at least 20% more than the calculated power requirement to ensure stable operation and account for any voltage drop over long runs.
Wiring and Connection Best Practices
When wiring your LED neon flex installation, use the appropriate gauge wire to minimize voltage drop. For longer runs, consider using a thicker gauge wire or implementing a parallel wiring configuration to maintain consistent brightness throughout the installation. Make all connections secure and waterproof, especially for outdoor installations. Use heat shrink tubing or waterproof wire nuts to protect connections from moisture and corrosion.
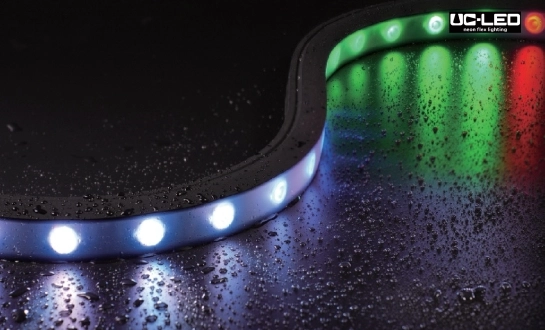
Implementing Dimming and Color Control
Many flexible LED neon flex products offer dimming and color-changing capabilities. To implement these features, you'll need compatible controllers and dimmers. Ensure that your chosen control system is compatible with the LED neon flex and power supply specifications. For complex installations with multiple zones or dynamic color changes, consider using a DMX512 control system for precise and flexible control over your lighting setup.
Conclusion
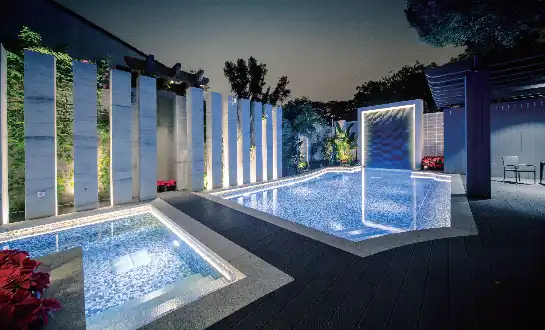
Installing flexible LED neon flex can transform any space with its vibrant, energy-efficient illumination. By following these installation tips and best practices, you can ensure a successful and long-lasting lighting installation. Remember to always prioritize safety, follow manufacturer guidelines, and consult with professionals for complex or large-scale projects. With proper planning, preparation, and execution, your flexible LED neon flex installation will provide years of reliable and stunning lighting performance, enhancing the ambiance and functionality of your space.
FAQ
How long does flexible LED neon flex typically last?
High-quality flexible LED neon flex can last up to 50,000 hours or more when properly installed and maintained.
Can I install flexible LED neon flex outdoors?
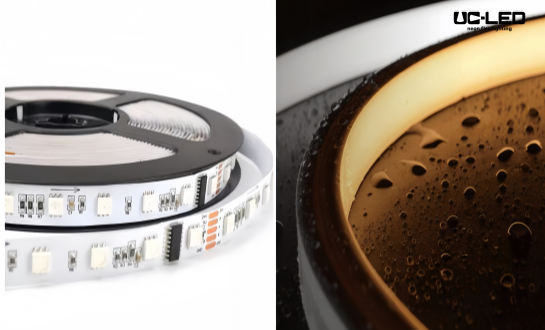
Yes, many flexible LED neon flex products are designed for outdoor use with IP65 or IP67 ratings for water resistance. Always check the product specifications and use appropriate sealing methods for outdoor installations.
How do I troubleshoot if a section of my LED neon flex isn't lighting up?
First, check all connections to ensure they're secure. If the issue persists, verify that the power supply is functioning correctly and that you haven't exceeded the maximum run length for the product.
Transform Your Space with QUAN HE's Flexible LED Neon Flex | Factory-Direct Quality and Innovation
At QUAN HE Lighting Co., Ltd., we're not just a manufacturer; we're your partner in illumination innovation. Our state-of-the-art factory produces top-quality flexible LED neon flex that meets the highest industry standards. With our expertise in custom solutions and commitment to excellence, we can help bring your lighting vision to life. Experience the QUAN HE difference—where quality meets creativity. For personalized assistance and to explore our range of lighting solutions, contact Linda@uc-led.com today.