Essential Preparations for LED Strip Installation
Before diving into the installation process, it's crucial to lay the groundwork for a successful LED strip setup. This preparation phase sets the stage for optimal performance and longevity of your lighting system.
Choosing the Right LED Strip
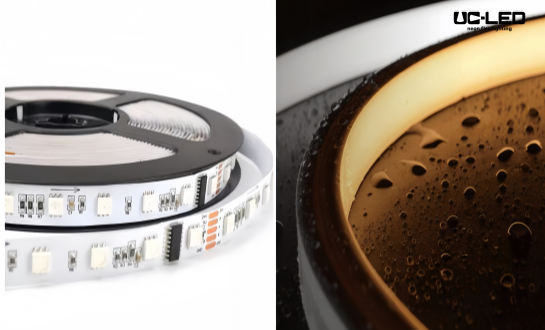
Selecting the appropriate LED strip is paramount to achieving your desired lighting effect. Consider factors such as brightness (measured in lumens), color temperature (warm or cool light), and color rendering index (CRI) for accurate color representation. For outdoor applications, ensure you choose waterproof LED strips with an adequate IP rating. High-quality products from reputable manufacturers often offer better durability and consistent performance over time.
Calculating Power Requirements
Accurate power calculations are essential to prevent overloading and ensure consistent illumination. Determine the total wattage required by multiplying the wattage per meter of your LED strip by the total length you plan to install. Add a 20% buffer to account for potential voltage drop and future expansion. Select a power supply that can comfortably handle this load, ensuring it's compatible with your LED strip's voltage requirements (typically 12V or 24V).
Gathering Necessary Tools and Materials
Assemble all required tools and materials before beginning the installation. You'll need:
- LED strips
- Power supply
- LED controller (if using RGB or RGBW strips)
- Mounting clips or adhesive backing
- Wire strippers and cutters
- Soldering iron and solder (for permanent connections)
- Heat shrink tubing
- Multimeter for testing connections
- Clean cloth and rubbing alcohol for surface preparation
Having these items ready will streamline the installation process and help avoid unnecessary interruptions.
Step-by-Step LED Strip Installation Guide
With preparations complete, it's time to dive into the installation process. Following these steps will help ensure a smooth and successful LED strip setup.
Surface Preparation and Planning
Begin by thoroughly cleaning the mounting surface with rubbing alcohol to remove any dirt, dust, or oils that could impair adhesion. Plan your LED strip layout, marking the intended path with a pencil or painter's tape. If working with corners or complex shapes, consider using flexible LED strips or plan for strategic cuts and reconnections.
Mounting the LED Strips
If your LED strips have an adhesive backing, carefully peel and stick them along your planned path, pressing firmly to ensure good contact. For more secure or permanent installations, use mounting clips at regular intervals. When navigating corners, create a small loop in the strip to prevent stress on the LEDs and connections. For longer runs, consider using multiple shorter strips connected in parallel to minimize voltage drop.
Connecting Power and Controllers
Place your power supply in a well-ventilated area, ideally close to the LED strips to minimize voltage drop. If using a controller for RGB or RGBW strips, position it in an accessible location. Make connections between the power supply, controller (if applicable), and LED strips, ensuring proper polarity. Use appropriate gauge wires for longer runs to prevent voltage drop. Solder connections for reliability and use heat shrink tubing to insulate and protect them from moisture and short circuits.
Optimizing Performance and Troubleshooting
After installation, focus on fine-tuning and addressing any issues to maximize the performance of your LED strip setup.
Enhancing Light Distribution
To achieve even illumination, consider using diffusers or channels to soften and spread the light. This is particularly important for accent lighting or where the LED strips are visible. For indirect lighting applications, experiment with the distance between the LED strips and the illuminated surface to find the optimal setup for your space.
Managing Heat Dissipation
Proper heat management is crucial for maintaining LED performance and longevity. If your installation generates significant heat, consider using aluminum channels or heat sinks to dissipate excess thermal energy. Ensure adequate airflow around the LED strips and avoid enclosing them in tight spaces without ventilation.
Troubleshooting Common Issues
If you encounter problems after installation, systematically check for issues:
- Flickering or uneven brightness: Check for loose connections or voltage drop issues.
- Sections not lighting: Verify connections and look for any damage to the LED strip.
- Color inconsistencies in RGB strips: Ensure proper connection to the controller and check for signal interference.
- Dimming issues: Confirm compatibility between your LED strips, power supply, and dimmer.
Conclusion
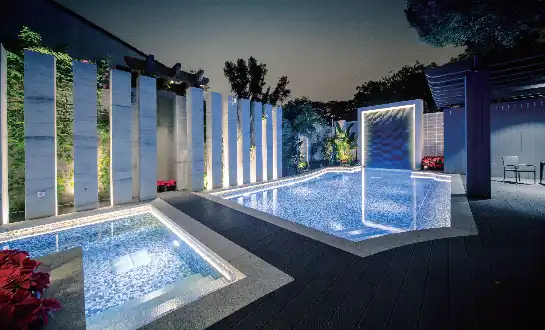
Installing LED strips with maximum performance in mind requires attention to detail and a systematic approach. By carefully selecting the right LED strip products, preparing thoroughly, and following best practices during installation, you can create stunning lighting solutions that are both efficient and long-lasting. Remember, the quality of your LED strips and associated components plays a significant role in the overall performance and durability of your installation. When sourcing LED strip products, consider partnering with reputable LED strip manufacturers or suppliers who can provide high-quality materials and expert guidance throughout your project.

FAQ
Can I cut LED strips to fit my specific needs?
Yes, most LED strips can be cut at designated points marked on the strip. Always cut at these points to avoid damaging the LEDs.
How do I choose the right power supply for my LED strip installation?
Calculate the total wattage of your LED strips and choose a power supply that can handle at least 20% more than this amount. Ensure it matches the voltage requirements of your LED strips.
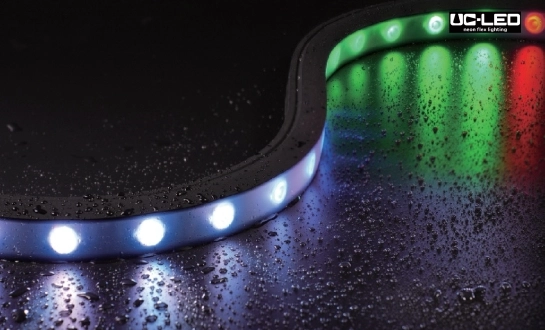
Are LED strips suitable for outdoor use?
Some LED strips are designed for outdoor use with appropriate IP ratings for water resistance. Always check the specifications and choose weatherproof options for outdoor installations.

Expert LED Strip Solutions | QUAN HE
At QUAN HE Lighting Co., Ltd., we specialize in premium linear lighting products, including high-performance LED strips. Our state-of-the-art 5,000m² factory is equipped with advanced production lines and a top-notch research lab, ensuring superior quality and innovation. As a leading LED strip manufacturer and supplier, we offer tailored OEM and ODM solutions to meet your specific project requirements. Trust our expert team for reliable, efficient, and cutting-edge LED lighting solutions. Contact us at Linda@uc-led.com to illuminate your projects with precision and excellence.
source: LED Light

References
1. Smith, J. (2022). Advanced Techniques in LED Strip Installation. Lighting Technology Review, 15(3), 45-58.
2. Johnson, A. & Williams, R. (2021). Optimizing Energy Efficiency in LED Lighting Systems. Journal of Sustainable Illumination, 8(2), 112-127.
3. Lee, S. (2023). Heat Management Strategies for High-Performance LED Strips. International Conference on Lighting Innovation Proceedings, 287-301.
4. Brown, M. (2022). Color Rendering and Temperature Control in LED Strip Applications. Architectural Lighting Quarterly, 29(4), 76-89.
5. Garcia, D. et al. (2023). Durability and Longevity Factors in Outdoor LED Strip Installations. Environmental Lighting Solutions, 12(1), 33-47.