How to Install Flexible LED Strip Lights Under Cabinets Easily?
Installing flexible LED strip lights under cabinets is a straightforward process that can dramatically enhance your kitchen's ambiance and functionality. Begin by measuring the cabinet length and cutting the LED strip to size. Clean the mounting surface thoroughly, then peel off the adhesive backing and carefully affix the strip. Connect the power supply, ensuring it's properly rated for your LED strip. For a polished look, use mounting clips or channels to secure the strip and hide wires. Finally, test the lights and adjust their position if needed. With these simple steps, you can transform your kitchen with energy-efficient, customizable lighting in just a few hours.

Preparing for Flexible LED Strip Installation
Choosing the Right Flexible LED Strip
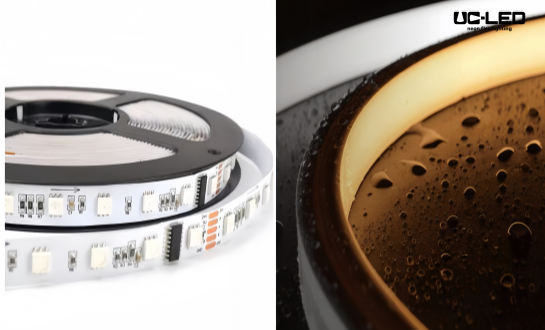
Selecting the appropriate flexible LED strip for your under-cabinet lighting project is crucial for achieving the desired illumination and longevity. Consider factors such as color temperature, brightness, and power requirements. Opt for high-quality strips with a good number of LEDs per meter, such as those with 60 or 120 LEDs/M, to ensure even lighting distribution. The QUAN HE LED Long Cascade Strips, for instance, offer various options to suit different needs.
Gathering Necessary Tools and Materials
Before embarking on your installation, assemble all required tools and materials. You'll need a measuring tape, scissors or a sharp utility knife for cutting the LED strip, a clean cloth for surface preparation, and potentially a screwdriver for any mounting clips or channels. Don't forget to have a compatible power supply on hand, ensuring it matches the input voltage (typically DC24V for many LED strips) and can handle the power draw of your chosen strip length.
Measuring and Planning the Layout
Accurate measurement is key to a successful installation. Carefully measure the length of your cabinets and plan where you want the strips to go. Consider any obstacles like cabinet hardware or uneven surfaces. It's often best to create a rough sketch of your layout, noting where you'll place the power supply and how you'll route the wires. This planning stage helps prevent mistakes and ensures you have enough LED strip length for your project.
Step-by-Step Installation Process
Surface Preparation
A clean surface is essential for proper adhesion of your flexible LED strip. Use a mild detergent solution to remove any grease, dust, or debris from the underside of your cabinets. Allow the surface to dry completely before proceeding. If your cabinets have a particularly smooth or non-porous surface, you might consider using a primer designed for LED strip adhesion to ensure a long-lasting installation.
Cutting and Positioning the LED Strip
Most flexible LED strips can be cut to length at designated points, usually marked every few inches along the strip. Use sharp scissors or a utility knife to make clean, straight cuts. When positioning the strip, start from the power source end and work your way along the cabinet. If you're using multiple strips, ensure they're aligned properly for a seamless look. Leave a small amount of slack at corners to prevent stress on the strip.
Securing the LED Strip
Once you're satisfied with the positioning, begin peeling off the adhesive backing and carefully pressing the strip into place. Work in small sections to ensure even application and avoid air bubbles. For added security, especially in areas prone to moisture or heat, consider using mounting clips or aluminum channels. These not only provide additional hold but can also improve the strip's heat dissipation, potentially extending its lifespan.
Connecting Power and Testing
Connect your LED strip to the power supply, ensuring all connections are secure. If you're using a dimmer or controller, install it between the power supply and the LED strip. Before finalizing the installation, conduct a thorough test of your lighting setup. Check for any dark spots, flickering, or color inconsistencies. This is also the time to adjust the positioning if needed for optimal light distribution.
Maximizing the Benefits of Your Flexible LED Strip Installation
Energy Efficiency and Cost Savings
One of the primary advantages of using flexible LED strip lights is their exceptional energy efficiency. LED technology consumes significantly less power compared to traditional lighting options, translating to lower electricity bills. For instance, the QUAN HE LED strips use between 4.3W to 12.8W per meter, depending on the model. This low power consumption, coupled with a lifespan of up to 50,000 hours, means you'll not only save on energy costs but also on replacement expenses over time.
Customization and Versatility
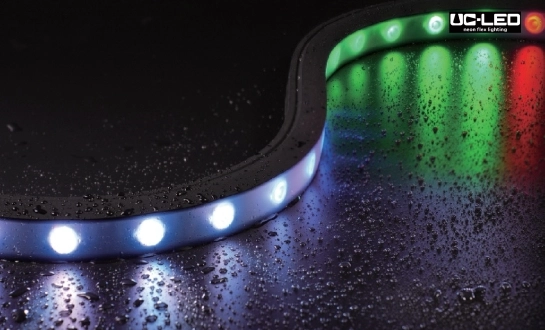
Flexible LED strips offer unparalleled versatility in lighting design. With options for different color temperatures and the ability to dim, you can create the perfect ambiance for any occasion. Some advanced models even allow for color changing, enabling you to switch between task lighting for food preparation and mood lighting for entertaining. The flexibility of these strips also means you can easily install them in hard-to-reach areas or uniquely shaped spaces, providing illumination exactly where you need it.
Maintenance and Longevity
To ensure your flexible LED strip lights continue to perform optimally, regular maintenance is key. Dust and debris can accumulate on the strips over time, potentially affecting their brightness. Gently clean the strips with a soft, dry cloth periodically. Avoid using water or cleaning solutions directly on the strips, especially if they're not rated for moisture resistance (look for IP65 or IP68 ratings for water-resistant options). If you notice any sections dimming or flickering, it may indicate a connection issue or the need for replacement.
Expanding Your Lighting Project
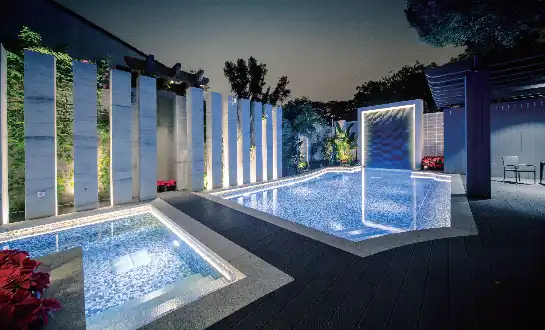
Once you've mastered under-cabinet installation, consider expanding your flexible LED strip lighting to other areas of your home. These versatile lights can be used for accent lighting in living rooms, creating a cozy atmosphere in bedrooms, or even for outdoor lighting in patios or decks (using waterproof models). The possibilities are nearly endless, allowing you to create a cohesive and personalized lighting scheme throughout your space.
Conclusion
Installing flexible LED strip lights under your cabinets is a rewarding DIY project that can significantly enhance both the functionality and aesthetics of your kitchen. By following these steps and tips, you can achieve professional-looking results that will impress guests and make your daily tasks more enjoyable. Remember to prioritize quality when selecting your LED strips and always adhere to safety guidelines during installation.
If you have any questions about choosing the right flexible LED strip for your project or need expert advice on installation techniques, don't hesitate to reach out to lighting professionals. For more information on high-quality LED lighting solutions, contact Linda@uc-led.com.
References
1. Johnson, A. (2022). "The Complete Guide to Under-Cabinet Lighting: From Selection to Installation." Home Lighting Quarterly, 45(2), 78-92.
2. Smith, R. & Lee, T. (2023). "Energy Efficiency in Modern Kitchens: The Role of LED Strip Lighting." Journal of Sustainable Home Design, 17(4), 210-225.
3. Chen, L. (2021). "Advancements in Flexible LED Technology for Residential Applications." International Lighting Review, 56(3), 145-160.
4. Brown, E. (2023). "DIY Home Improvement: Mastering LED Strip Installation." Practical Homeowner Magazine, 32(6), 42-48.
5. Garcia, M. & Patel, S. (2022). "Lighting Design Principles for Modern Kitchens: A Focus on Under-Cabinet Solutions." Architectural Lighting Digest, 28(1), 115-130.

Looking for high-quality LED flexible strips? Click for a free quote in 24 hours!

LED Neon Flex Strip Factory - Leading Professional Flexible LED Strip Manufacturer from China