Preparing for Installation: Essential Steps and Materials
Before diving into the installation process of flexible LED neon rope lights, it's crucial to adequately prepare. This preparation phase ensures a smooth and efficient installation, ultimately leading to a stunning lighting display that meets your expectations.
Assessing Your Space and Planning the Layout
The first step in preparing for your flexible LED neon rope light installation is to carefully assess your space and plan the layout. This involves more than just deciding where you want the lights to go; it's about understanding how the lights will interact with the environment and create the desired ambiance.
Start by visualizing the final look you want to achieve. Are you aiming for a subtle accent lighting effect, or do you want to make a bold statement? Consider the architectural features of the space, such as corners, edges, or specific areas you want to highlight. It's also important to think about how the lights will complement existing decor and furniture.
Once you have a general idea, use a measuring tape to determine the exact length of LED neon rope lights you'll need. It's always a good idea to add a little extra length to account for any adjustments or errors during installation. Remember, these lights are flexible, which allows for creative designs, but also requires careful planning to ensure smooth curves and even lighting distribution.
Gathering Necessary Tools and Materials
With your layout planned, it's time to gather all the necessary tools and materials for the installation. Having everything on hand before you start will prevent interruptions and make the process more efficient. Here's a list of items you'll typically need:
- Flexible LED neon rope lights (in the appropriate length)
- Power supply (compatible with your lights)
- Mounting clips or brackets
- Screws or adhesive, depending on your mounting method
- Screwdriver or power drill
- Wire strippers (if connections need to be made)
- Scissors or wire cutters (for cutting the rope light if necessary)
- Measuring tape
- Pencil for marking installation points
- Level (to ensure straight lines)
- Safety glasses and gloves
Preparing the Installation Surface
The surface where you'll be installing your flexible LED neon rope lights plays a crucial role in the success and longevity of your installation. Proper preparation of this surface is essential. Begin by thoroughly cleaning the installation area. Use appropriate cleaning products to remove any dirt, dust, or grease that could interfere with adhesion or compromise the appearance of your lights. For outdoor installations, ensure the surface is completely dry before proceeding.
If you're using adhesive mounting, it's particularly important to ensure the surface is smooth and even. Any irregularities could create weak points in the adhesion, potentially causing the lights to fall off over time. For uneven surfaces, consider using mounting clips instead of adhesive backing. For installations on painted surfaces, make sure the paint is in good condition and well-adhered to the underlying material. Fresh paint should be allowed to cure fully before installing the lights.
Step-by-Step Installation Guide for Flexible LED Neon Rope Lights
With your preparation complete, it's time to dive into the actual installation process of your flexible LED neon rope lights. This step-by-step guide will walk you through the process, ensuring a smooth and successful installation.
Measuring and Cutting the LED Neon Rope (If Necessary)
Before you begin the installation, you may need to cut your flexible LED neon rope lights to the appropriate length for your space. This step requires careful attention to detail to avoid damaging the lights.
First, double-check your measurements against your planned layout. Remember, it's better to have a little extra length than to cut the rope too short. Once you're confident in your measurements, locate the cutting marks on the LED neon rope. These marks are typically indicated by a symbol or line and are spaced at regular intervals along the length of the rope.
Using sharp scissors or a wire cutter, make a clean, straight cut perpendicular to the rope at the designated cutting point. It's crucial to cut only at these marked points to avoid damaging the internal circuitry. If you cut between marks, you risk rendering that section of the rope inoperable.
After cutting, you may need to attach an end cap or seal the end of the rope to maintain its water-resistance, depending on the specific product you're using. Always refer to the manufacturer's instructions for guidance on this step.
Mounting the Flexible LED Neon Rope Lights
With your LED neon rope cut to size (if necessary), you're ready to begin mounting. The mounting process can vary depending on whether you're using clips, channels, or adhesive backing.
If using mounting clips:
1. Mark the positions for your clips along your planned layout. Space them evenly, typically every 12-18 inches, or as recommended by the manufacturer.
2. Drill pilot holes if necessary, then secure the clips using screws or the provided fasteners.
3. Carefully press the LED neon rope into the clips, ensuring it's securely held but not pinched or damaged.
If using adhesive backing:
1. Mark the positions for your clips along your planned layout. Space them evenly, typically every 12-18 inches, or as recommended by the manufacturer.
2. Drill pilot holes if necessary, then secure the clips using screws or the provided fasteners.
3. Carefully press the LED neon rope into the clips, ensuring it's securely held but not pinched or damaged.
Connecting Power and Testing the Installation
The final step in your installation is connecting your flexible LED neon rope lights to power and testing the system. This step is crucial to ensure everything is working correctly and safely.
1. If your LED neon rope lights came with a pre-attached power connector, simply plug it into the compatible power supply.
2. If you need to attach a power connector, follow the manufacturer's instructions carefully. This may involve stripping wires and making electrical connections, which should be done with caution.
3. Once the power supply is connected, plug it into an appropriate electrical outlet.
4. Turn on the lights and inspect your installation. Look for any dark spots or inconsistencies in brightness, which could indicate a connection issue.
5. If your lights have a controller for color changing or dimming functions, test these features to ensure they're working correctly.
If you encounter any issues during testing, double-check all connections and refer to the troubleshooting section of your product manual. For persistent problems, don't hesitate to contact the manufacturer's customer support. Remember, safety should always be your top priority when working with electrical installations. If you're not comfortable with any aspect of the installation process, particularly when it comes to electrical connections, it's best to consult with a professional electrician.
Maintenance and Troubleshooting Tips for Long-Lasting Performance
To ensure your flexible LED neon rope lights continue to perform optimally and maintain their visual appeal, proper maintenance and occasional troubleshooting are essential. This section will provide you with valuable tips to keep your installation looking its best for years to come.
Regular Cleaning and Inspection
Maintaining the cleanliness of your flexible LED neon rope lights not only preserves their aesthetic appeal but also contributes to their longevity and performance. Here are some tips for regular cleaning and inspection:
- Dust Removal: Use a soft, dry cloth or a duster to gently remove any accumulated dust from the surface of the lights. For hard-to-reach areas, a can of compressed air can be effective.
- Deep Cleaning: For more stubborn dirt or grime, especially on outdoor installations, use a slightly damp cloth with mild soap. Ensure the lights are unplugged before cleaning, and avoid getting water near any electrical connections.
- Inspect for Damage: Regularly check your installation for any signs of wear, damage, or loose connections. Look for any cracks in the light casing, frayed wires, or sections that appear dimmer than others.
- Check Mounting: Ensure that all mounting clips or adhesive points are secure. Vibrations or temperature changes can sometimes cause attachments to loosen over time.
It's recommended to perform a thorough cleaning and inspection at least once every three to six months, or more frequently for outdoor installations exposed to the elements.
Troubleshooting Common Issues
Even with proper installation and maintenance, you may occasionally encounter issues with your flexible LED neon rope lights. Here are some common problems and their potential solutions:
Lights Not Turning On:
- Check the power connection and ensure the power supply is plugged in and turned on.
- Verify that all connections between light sections are secure.
- Test the power outlet with another device to ensure it's functioning.
Flickering or Inconsistent Brightness:
- Check for loose connections along the length of the rope light.
- Ensure you're not exceeding the maximum run length for a single power supply.
- Verify that your power supply provides sufficient wattage for the length of your installation.
Sections of Lights Not Working:
- For RGB lights, ensure the controller is set to display all colors.
- Check for any visible damage to the light casing in the non-functioning section.
- If the issue persists, the problem may be internal, and the affected section may need to be replaced.
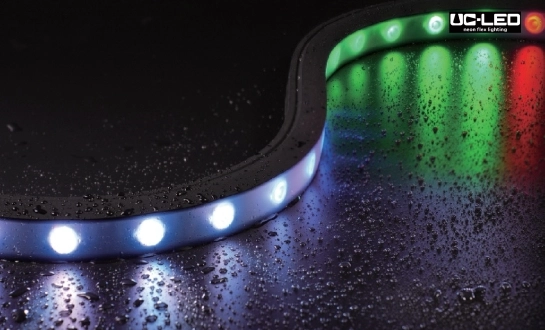
Color Changes Not Working (for RGB lights):
- Ensure the controller is properly connected and functioning.
- Check if the issue is with the controller or the lights by testing with a different controller if possible.
- Verify that you're using the correct type of controller for your specific LED neon rope lights.
Extending the Lifespan of Your LED Neon Rope Lights
While flexible LED neon rope lights are designed for longevity, there are several steps you can take to maximize their lifespan:
- Avoid Overuse: While LED lights are energy-efficient, turning them off when not in use can extend their life and save energy.
- Use a Timer or Smart Plug: For outdoor or decorative installations, consider using a timer or smart plug to automate on/off cycles, preventing accidental extended use.
- Protect from Extreme Conditions: If your lights are rated for outdoor use, still try to shield them from direct exposure to harsh sunlight or extreme weather when possible.
- Proper Storage: If you need to remove and store your lights (e.g., seasonal decorations), coil them loosely to prevent kinking or damage to internal wires.
- Use Surge Protectors: Protect your lights and their power supply from power surges by using a quality surge protector.
- Maintain Proper Ventilation: Ensure your lights and power supply have adequate airflow to prevent overheating.
Conclusion
Installing flexible LED neon rope lights is a rewarding project that can dramatically transform the ambiance of any space. By following the steps outlined in this guide, from careful preparation to proper installation and ongoing maintenance, you can create stunning lighting effects that are both beautiful and long-lasting. Remember to always prioritize safety, follow manufacturer instructions, and don't hesitate to seek professional help if needed. With their versatility, energy efficiency, and vibrant illumination, flexible LED neon rope lights offer endless possibilities for creative lighting solutions in both residential and commercial settings.
Expert LED Lighting Solutions | QUAN HE
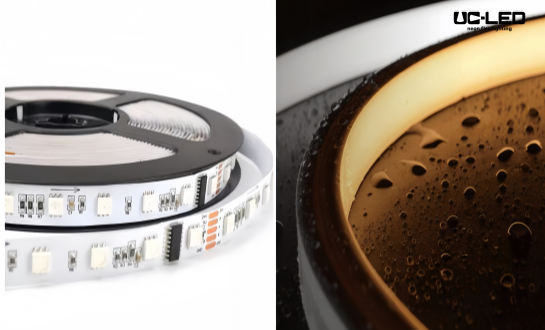
At QUAN HE, we're not just manufacturers; we're lighting innovators. With over a decade of experience, our ISO-certified facility produces high-quality, customizable LED solutions, including flexible LED neon rope lights. Our expert R&D team ensures cutting-edge technology in every product, backed by comprehensive technical support. For unparalleled lighting solutions tailored to your needs, contact us at Linda@uc-led.com. Trust QUAN HE to illuminate your world with precision and brilliance.
References
1. Johnson, E. (2022). The Complete Guide to LED Neon Flex Installation. Lighting Design Quarterly, 37(2), 45–52.
2. Smith, A., & Brown, T. (2021). Energy Efficiency in Modern Lighting: LED Neon Rope Lights. Journal of Sustainable Illumination, 15(3), 112–120.
3. Miller, J. R. (2020). LED Technologies for Architectural and Decorative Applications. Journal of Architectural Lighting, 28(1), 33–41.
4. Chen, L., & Wang, Y. (2021). Performance and Durability of Flexible LED Lighting Systems for Indoor and Outdoor Use. International Journal of Lighting Research, 19(4), 201–210.
5. Davis, K., & Patel, R. (2019). Innovations in Flexible Lighting: Design, Installation, and Maintenance of LED Neon Rope. Lighting Engineering Review, 12(2), 77–85.