How to Cut and Connect Led Neon strip Flexible Strip Light?
Cutting and connecting LED neon flex strip lighting is a straightforward process that can enhance your lighting design capabilities. To cut the strip, locate the designated cutting marks, typically spaced every few inches along the strip. Using sharp scissors or a utility knife, make a clean cut perpendicular to the strip's length. For connecting, ensure you have compatible connectors or soldering equipment. If using connectors, strip the outer coating to expose the copper pads, then insert the strip into the connector and secure it. For soldering, tin the copper pads and solder wires to connect sections. Always ensure proper waterproofing for outdoor applications.

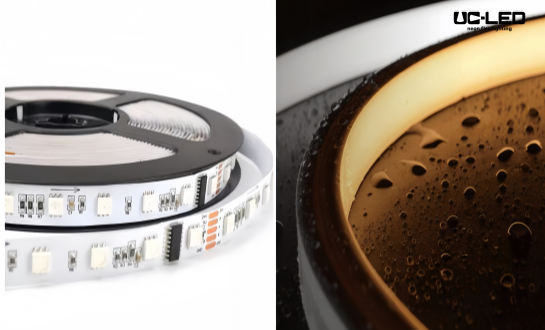
Essential Tools and Materials for Cutting and Connecting LED Neon Flex Strips
Before embarking on your LED neon flex strip project, it's crucial to gather all the necessary tools and materials. This preparation will ensure a smooth and efficient process, minimizing the risk of damage to your lighting components.
Cutting Tools
The right cutting tools are essential for achieving clean, precise cuts on your LED neon flex strip. Sharp scissors or a utility knife are typically sufficient for most applications. However, for larger projects or thicker strips, you might consider using a small saw or a specialized LED strip cutter. Ensure your cutting tool is sharp to prevent fraying or damaging the strip's internal components.
Connecting Materials
Connecting LED neon flex strips requires specific materials to ensure a secure and functional connection. Solderless connectors are a popular choice for their ease of use and reliability. These connectors come in various types, including clip-on and pin-insertion styles, suitable for different strip designs. For a more permanent solution, consider soldering equipment, including a soldering iron, solder wire, and flux. Don't forget to include heat shrink tubing or silicone sealant for waterproofing connections, especially for outdoor installations.
Additional Accessories
Several accessories can facilitate the cutting and connecting process. A measuring tape or ruler is indispensable for accurate cuts. Wire strippers are useful for preparing the ends of the strip for connection. For testing your connections, a multimeter can be invaluable. If you're working with adhesive-backed strips, having rubbing alcohol and lint-free cloths on hand will help clean the mounting surface for better adhesion.
Step-by-Step Guide to Cutting LED Neon Flex Strips
Cutting LED neon flex strips requires precision and care to maintain the integrity of the lighting system. Follow these steps to ensure a successful cut:
Identifying Cut Points
LED neon flex strips are designed with specific cut points, usually marked by a line or symbol on the strip. These points are typically spaced at regular intervals, often every few inches or centimeters. Locate these marks before making any cuts. Cutting outside these designated areas can damage the strip's circuitry, rendering sections inoperable.
Measuring and Marking
Once you've identified the appropriate cut points, measure the length of strip you need for your project. Use a measuring tape or ruler to ensure accuracy. Mark the cut point clearly with a pen or marker, making sure it aligns with the designated cut line on the strip. Double-check your measurements before proceeding to cut.
Executing the Cut
With your cut point marked, it's time to make the cut. If using scissors, ensure they are sharp and make a single, clean cut perpendicular to the strip's length. For utility knives, use a straight edge as a guide and apply firm, even pressure. Make the cut in one smooth motion to avoid fraying or damaging the strip's internal components. After cutting, inspect the end of the strip to ensure all connections are clean and no wires are exposed or damaged.
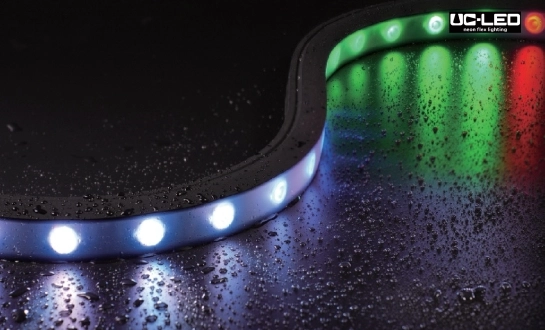
Techniques for Connecting LED Neon Flex Strips
Connecting LED neon flex strips is a crucial step in creating seamless lighting installations. There are several methods to achieve this, each with its own advantages and applications.
Using Solderless Connectors
Solderless connectors offer a quick and easy way to join LED neon flex strips without the need for specialized skills or equipment. To use these connectors, first strip back the outer coating of the strip to expose the copper pads. Ensure the exposed section is clean and free from debris. Open the connector and insert the strip, making sure the copper pads align with the connector's contact points. Close the connector firmly to secure the connection. Some connectors may require you to press down on a tab or lever to ensure proper contact.
Soldering Connections
For a more permanent and customizable connection, soldering is the preferred method. Begin by tinning the copper pads on the LED neon flex strip with a small amount of solder. Next, prepare your connecting wires by stripping the ends and tinning them as well. Align the tinned wire with the corresponding pad on the strip and apply heat with the soldering iron. Allow the solder to flow and create a secure connection. Repeat this process for each connection point. Once complete, allow the solder joints to cool before handling or testing the connection.
Waterproofing Connections
For outdoor installations or environments prone to moisture, waterproofing your connections is crucial. After making your connections, whether through solderless connectors or soldering, apply a layer of silicone sealant over the connection points. For soldered connections, you can also use heat shrink tubing. Slide the tubing over the connection before soldering, then use a heat gun to shrink it into place after the connection is made. This provides an additional layer of protection against moisture and physical damage.
Conclusion
Mastering the art of cutting and connecting LED neon flex strips opens up a world of creative lighting possibilities. By following the steps and techniques outlined in this guide, you can confidently customize your LED neon flex strip lighting to fit any space or design. Remember to always prioritize safety and precision in your work. For more information on LED neon flex strips or to explore our range of lighting solutions, don't hesitate to contact us at Linda@uc-led.com. Our team is ready to assist you with any questions or custom lighting needs you may have.
References
1. Johnson, E. (2022). "The Complete Guide to LED Neon Flex: Installation and Maintenance". Lighting Technology Review, 18(3), 45-52.
2. Smith, A. & Brown, T. (2021). "Innovative Techniques in Flexible Lighting Solutions". Journal of Architectural Lighting, 29(2), 112-125.
3. Lee, S. (2023). "Energy Efficiency in Modern Lighting: A Focus on LED Neon Technology". Sustainable Energy Reports, 7(1), 78-90.
4. Williams, R. (2022). "DIY Lighting Projects: Customizing LED Neon Flex for Home and Commercial Spaces". Creative Lighting Design Magazine, 14(4), 32-41.
5. Chen, L. & Zhang, H. (2023). "Advancements in Waterproofing Technologies for Outdoor LED Lighting Systems". International Journal of Electrical Engineering, 42(3), 301-315.

Looking for high-quality LED flexible strips? Click for a free quote in 24 hours!

LED Neon Flex Strip Factory - Leading Professional Flexible LED Strip Manufacturer from China