How do you connect flexible LED strip lights?
Connecting flexible LED strip lights is a straightforward process that can be accomplished with a few simple steps. To begin, ensure you have all the necessary components: the LED strip, a compatible power supply, and connectors if needed. Start by measuring and cutting the LED strip to the desired length, making sure to cut along the designated marks. Next, connect the strip to the power supply, typically by attaching the positive and negative wires to the corresponding terminals. If using connectors, align the strip with the connector and secure it in place. Finally, plug in the power supply and test the connection to ensure the LEDs light up properly. With these steps, you can easily install and illuminate your space with versatile flexible LED strip lights.

Essential Components for Connecting Flexible LED Strip Lights
Understanding LED Strip Light Components
Before diving into the connection process, it's crucial to familiarize yourself with the key components of a flexible LED strip light system. The primary elements include the LED strip itself, a power supply (often referred to as a driver), and optional accessories such as connectors and controllers.
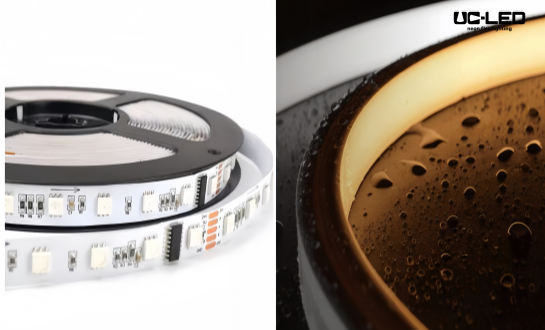
The LED strip is the star of the show, featuring a series of small light-emitting diodes mounted on a flexible circuit board. These strips come in various lengths, colors, and brightness levels, allowing for customization to suit diverse lighting needs. The flexibility of these strips enables them to conform to curved surfaces or fit into tight spaces, making them incredibly versatile for both residential and commercial applications.
A compatible power supply is essential for providing the correct voltage and current to your LED strip. Most flexible LED strip lights operate on low voltage DC power, typically 12V or 24V. Selecting the appropriate power supply ensures optimal performance and longevity of your lighting setup.
Selecting the Right Power Supply
Choosing the correct power supply is paramount for the proper functioning and safety of your flexible LED strip light installation. The power supply you select must match the voltage requirements of your LED strip, which is typically either 12V or 24V DC. Additionally, it should provide sufficient wattage to support the total power consumption of your LED strips.
To determine the appropriate wattage, calculate the power consumption of your entire LED strip setup. Most manufacturers provide specifications indicating the wattage per meter or foot of strip. Multiply this by the total length of your installation, and then add a 20% buffer to ensure your power supply can handle the load without strain.
For example, if you have a 5-meter strip that consumes 14.4 watts per meter, your total power consumption would be 72 watts. Adding a 20% buffer brings this to 86.4 watts, so you would need a power supply rated at 90 watts or higher.
Connector Types and Their Applications
Connectors play a vital role in creating seamless and professional-looking flexible LED strip light installations. They come in various types, each designed for specific applications and installation scenarios. Understanding these connector types can help you choose the most appropriate option for your project.
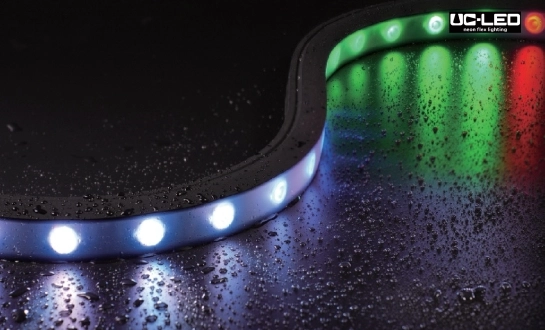
Strip-to-strip connectors are used to join two sections of LED strip together. These are particularly useful when you need to extend your lighting around corners or create longer runs. They typically come in straight or L-shaped configurations, allowing for flexibility in your design.
Strip-to-wire connectors facilitate the connection between the LED strip and the power supply or controller. These connectors often feature a small PCB with solder pads on one end and wire leads on the other, making it easy to integrate the strip into your electrical system without the need for soldering.
Solderless connectors have gained popularity due to their ease of use. These clip-style connectors allow for quick and tool-free installation, making them ideal for DIY projects or situations where frequent reconfiguration is necessary.
Step-by-Step Guide to Connecting Flexible LED Strip Lights
Preparing the LED Strip
The first step in connecting your flexible LED strip lights is proper preparation. Begin by unrolling the LED strip and laying it out in the area where you plan to install it. This allows you to visualize the placement and make any necessary adjustments before cutting or connecting.
Most flexible LED strips have designated cutting points marked along their length. These are typically indicated by copper pads or printed lines on the strip. It's crucial to cut only at these designated points to avoid damaging the circuitry. Use a sharp pair of scissors or a utility knife to make clean, straight cuts perpendicular to the strip's length.
If your installation requires multiple sections of LED strip, measure and cut each section separately. Remember to account for any corners or obstacles in your installation path. It's often better to cut the strip slightly longer than needed, as you can always trim it further, but you can't easily extend a strip that's too short.
After cutting, inspect the end of the strip to ensure the copper pads are clean and free from any frayed edges or debris. If necessary, use a small file or sandpaper to smooth the cut edge, being careful not to damage the conductive pads.
Making the Electrical Connections
With your LED strip prepared, the next step is to make the electrical connections. If you're using connectors, align the strip with the connector, ensuring that the positive and negative terminals match up correctly. Most strips and connectors are marked with "+" and "-" symbols to guide proper alignment. Gently insert the strip into the connector and secure it according to the connector's design—this may involve closing a clip or tightening screws.
For soldered connections, tin the copper pads on the LED strip with a small amount of solder. Then, carefully solder the wires from your power supply or connector to these pads, ensuring a strong and clean connection. Remember to match the polarity: the positive wire (usually red) should connect to the "+" pad, and the negative wire (usually black) to the "-" pad.
If you're connecting multiple strips in series, use strip-to-strip connectors or solder bridge wires between the sections. Ensure that the total length of connected strips doesn't exceed the maximum run length specified by the manufacturer, as this can lead to voltage drop and uneven lighting.
When connecting the strip to the power supply, double-check the voltage compatibility. Most flexible LED strips operate on either 12V or 24V DC. Connecting a 12V strip to a 24V supply will likely damage the LEDs, while using a 12V supply for a 24V strip will result in dim or non-functioning lights.
Testing and Troubleshooting
After making all the connections, it's crucial to test your flexible LED strip light setup before finalizing the installation. This step helps identify any issues early, saving time and preventing potential damage.
Start by plugging in the power supply and turning on the system. Check that all sections of the LED strip light up evenly and display the correct color (if using RGB or multicolor strips). Pay special attention to the connection points between strips or at the power input to ensure there are no dark spots or flickering.
If you encounter any issues, systematically troubleshoot the setup. Common problems and their solutions include:
- No lights: Check the power supply connection and ensure it's plugged in and switched on. Verify that the voltage output matches the LED strip requirements.
- Partial lighting: This often indicates a poor connection. Inspect all connection points, especially if using multiple strip sections.
- Dim or inconsistent lighting: This could be due to voltage drop in long runs. Consider adding a power injection point midway through the strip or using a higher gauge wire for power distribution.
- Incorrect colors (for RGB strips): Ensure all color channels are properly connected. Sometimes, a loose connection can result in missing colors.
Advanced Techniques for Complex Installations
Creating Custom Shapes and Patterns
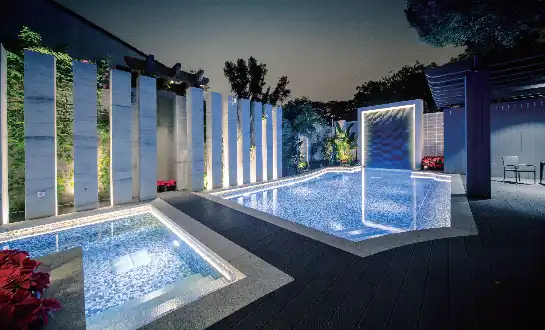
One of the most compelling attributes of flexible LED strip lights is their adaptability to various shapes and patterns, allowing for creative and eye-catching installations. When designing custom shapes, it's important to plan your layout carefully, considering both the aesthetic appeal and the technical limitations of the LED strip.
For curved designs, use the natural flexibility of the strip to create smooth arcs. However, be mindful of the minimum bend radius specified by the manufacturer to avoid damaging the internal connections. If you need to create tighter curves or complex shapes, consider using shorter segments of LED strip connected at angles.
Creating geometric patterns or logos often requires precise cutting and connecting of multiple strip sections. Use a template or stencil to guide your cuts and placements. For intricate designs, addressable LED strips offer pixel-level control, allowing for more detailed patterns and animations.
Integrating with Smart Home Systems
Integrating flexible LED strip lights with smart home systems can dramatically enhance their functionality and user experience. This integration allows for seamless control of your lighting alongside other smart devices, creating cohesive and automated home environments.
To begin, choose LED strips and controllers that are compatible with popular smart home protocols such as Zigbee, Z-Wave, or Wi-Fi. Many manufacturers now offer smart controllers that can connect directly to your home network or work with hubs like Amazon Alexa, Google Home, or Apple HomeKit.
Once connected, you can control your LED strips through voice commands, smartphone apps, or automated routines. This enables features like scheduling, scene setting, and synchronization with other smart devices. For example, you could set your kitchen under-cabinet lights to turn on automatically when you enter the room, or have your bedroom lights gradually dim as bedtime approaches.
Advanced integrations can leverage sensors and other smart home data to create dynamic lighting experiences. Motion sensors can trigger pathway lighting, while weather data could adjust the color temperature of your lights to complement natural daylight cycles.
Maximizing Energy Efficiency
While LED technology is inherently energy-efficient, there are several strategies to further optimize the power consumption of your flexible LED strip light installation. Implementing these techniques not only reduces energy costs but also extends the lifespan of your lighting system.
Start by selecting high-quality LED strips with superior efficacy ratings. These strips produce more light per watt, allowing you to achieve desired brightness levels with lower power consumption. Look for strips that offer a high lumen-per-watt ratio and consider using white or single-color LEDs for applications where color-changing capabilities aren't necessary, as these tend to be more efficient than RGB strips.
Incorporate dimming functionality into your setup. By adjusting the brightness to suit different times of day or activities, you can significantly reduce power usage. Many smart controllers offer adaptive dimming features that automatically adjust light levels based on ambient light conditions or occupancy.
Zoning your lighting system allows for more granular control, ensuring that lights are only active in areas where they're needed. Use separate controllers or addressable LED strips to create independent zones that can be managed individually.
Implement motion sensors and timers to automate your lighting, preventing unnecessary operation when areas are unoccupied. This is particularly effective for spaces with intermittent use, such as closets, hallways, or outdoor areas.
Consider the color temperature of your LEDs for different applications. Cooler temperatures (higher Kelvin ratings) can appear brighter, potentially allowing you to use fewer LEDs or lower power settings while maintaining adequate illumination.
Conclusion
Connecting flexible LED strip lights opens up a world of creative lighting possibilities for any space. From simple single-strip installations to complex, smart-home integrated systems, the versatility of LED strips makes them an excellent choice for both novice DIY enthusiasts and professional lighting designers. By understanding the components, following proper installation techniques, and exploring advanced applications, you can transform your environment with stunning, energy-efficient illumination.
As LED technology continues to evolve, stay informed about the latest innovations and best practices in flexible lighting solutions. For more information on cutting-edge LED strip products and custom lighting solutions, don't hesitate to reach out to industry experts. You can contact us at Linda@uc-led.com for personalized advice and product recommendations tailored to your specific lighting needs.
References
1. Smith, J. (2022). The Complete Guide to LED Strip Lighting. Illumination Engineering Society.
2. Johnson, A. & Brown, T. (2021). DIY Home Lighting: LED Strip Installation Techniques. Home Improvement Press.
3. Lee, S. (2023). Smart Home Integration with Flexible LED Lighting. Journal of Smart Home Technologies, 15(3), 78-92.
4. Garcia, M. (2020). Energy Efficiency in LED Strip Lighting Systems. Sustainable Lighting Solutions Quarterly, 8(2), 45-57.
5. Wilson, R. (2022). Troubleshooting Common Issues in LED Strip Installations. Electrical Contractor Magazine, 87(4), 62-68.

Looking for high-quality LED flexible strips? Click for a free quote in 24 hours!

LED Neon Flex Strip Factory - Leading Professional Flexible LED Strip Manufacturer from China