Easy Step-by-Step Guide to Installing 360 Degree LED Neon Flex
Installing 360 Degree LED Neon Flex can transform any space with its vibrant, omnidirectional lighting. This guide walks you through the process, from planning to powering up. You'll learn how to measure and prepare your installation area, safely cut and connect the neon flex, and secure it in place. With proper tools and attention to detail, you can create stunning lighting effects that enhance both indoor and outdoor environments. Whether you're a DIY enthusiast or a professional, this guide ensures a smooth installation process for your 360 Degree LED Neon Flex project.

Preparing for Installation: Essential Tools and Planning
Gathering the Necessary Tools and Materials
Before diving into the installation of your 360 Degree LED Neon Flex, it's crucial to assemble all the required tools and materials. This preparation ensures a smooth and efficient installation process. Here's a comprehensive list of what you'll need:
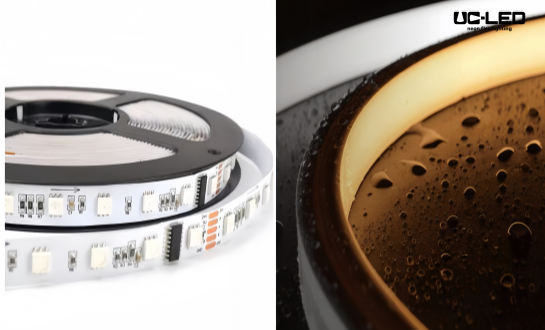
- 360 Degree LED Neon Flex strip
- Power supply (compatible with your neon flex's voltage requirements)
- Mounting clips or channels
- Screwdriver or drill (depending on your mounting surface)
- Wire strippers
- Scissors or a sharp utility knife
- Electrical tape
- Silicone sealant (for outdoor installations)
- Measuring tape
- Pencil or marker for marking installation points
- Level (for ensuring straight installations)
- Safety glasses and gloves
Having these items ready will save you time and prevent interruptions during the installation process. It's also wise to have extra connectors and end caps on hand, as these can be useful for custom installations or if you need to make adjustments.
Planning Your Installation Layout
Proper planning is the cornerstone of a successful 360 Degree LED Neon Flex installation. Take time to visualize and sketch out your desired layout. Consider the following factors:
- Measure the area where you'll install the neon flex accurately. This helps determine the length of strip you'll need and identifies any potential obstacles.
- Identify power source locations. Ensure your neon flex can reach the power supply without overextending.
- Plan for corners and curves. 360 Degree LED Neon Flex is flexible, but it has limits. Check the minimum bend radius specified by the manufacturer to avoid damaging the strip.
- Consider the surface material. Different surfaces may require specific mounting techniques or additional preparation.
- For outdoor installations, plan for weatherproofing. Ensure all connections and power supplies are properly protected from the elements.
Step-by-Step Installation Process
Preparing the Surface and Measuring
The first step in installing your 360 Degree LED Neon Flex is preparing the surface and taking accurate measurements. Follow these steps:
1. Clean the installation surface thoroughly. Remove any dust, grease, or debris that could interfere with adhesion.
2. Use your measuring tape to precisely measure the area where you'll install the neon flex. Mark key points with a pencil or marker.
3. If you're creating a specific shape or design, use a level to ensure your markings are straight and aligned.
4. For installations on uneven surfaces, consider using a mounting channel to create a smooth path for the neon flex.
Cutting and Connecting the Neon Flex
One of the advantages of 360 Degree LED Neon Flex is its customizability. Here's how to cut and connect your neon flex:
1. Locate the designated cutting points along the neon flex. These are typically marked and spaced at regular intervals.
2. Using sharp scissors or a utility knife, make a clean, straight cut at the marked point. Ensure the cut is perpendicular to the length of the strip.
3. If you need to join sections or connect to the power supply, use the appropriate connectors. Strip the wires if necessary, ensuring a solid connection.
4. For outdoor installations or areas prone to moisture, apply silicone sealant to the cut ends and connections to maintain the waterproof integrity of the neon flex.
Always double-check the polarity when making connections to ensure proper function of your 360 Degree LED Neon Flex.
Mounting and Securing the Neon Flex
With your surface prepared and neon flex cut to size, it's time to mount and secure it:
1. If using mounting clips, space them evenly along your installation path. For straight runs, place a clip every 12-18 inches. For curves, you may need to space them closer together.
2. Secure the mounting clips to the surface using screws or strong adhesive, depending on your surface material.
3. Gently press the 360 Degree LED Neon Flex into the mounting clips, ensuring it's securely held but not pinched or distorted.
4. For additional security, especially in outdoor installations, you can apply a thin bead of clear silicone adhesive along the back of the neon flex before pressing it into place.
5. If using a mounting channel, secure the channel to the surface first, then gently press the neon flex into the channel.
Powering Up and Troubleshooting
Connecting to Power and Controllers
The final step in your 360 Degree LED Neon Flex installation is connecting it to power and, if applicable, a controller. Here's how to do it safely:
1. Ensure your power supply matches the voltage requirements of your neon flex. Most operate on 12V or 24V DC.
2. Connect the neon flex to the power supply, respecting the polarity. The positive wire is typically red, and the negative is usually black.
3. If using a controller for color-changing or dimming functions, connect it between the power supply and the neon flex according to the manufacturer's instructions.
4. Double-check all connections before plugging in the power supply.
5. Once everything is connected, plug in the power supply and test your installation.
Always follow proper electrical safety practices and consult a professional if you're unsure about any aspect of the electrical connection.
Common Issues and Solutions
Even with careful installation, you might encounter some issues. Here are some common problems and their solutions:
- Neon flex doesn't light up: Check all connections, ensure proper polarity, and verify that the power supply is functioning.
- Uneven brightness: This could indicate a voltage drop. Try connecting power at both ends for longer runs or use a higher gauge wire.
- Flickering: This might be due to loose connections or an incompatible dimmer. Secure all connections and ensure you're using a compatible control system.
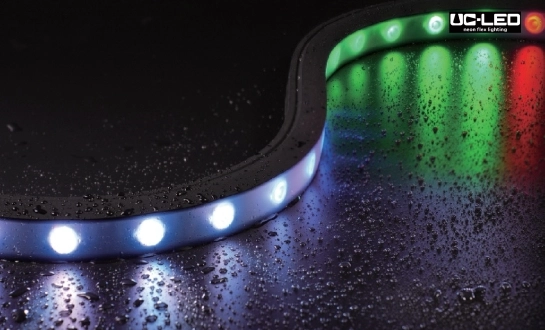
- Color inconsistency in RGB models: Check for loose connections in the color wires. Ensure your controller is compatible with your specific neon flex model.
- Water ingress in outdoor installations: Recheck all seals and connections. Apply additional silicone sealant if necessary.
Regular maintenance and inspection can help prevent many of these issues and ensure the longevity of your 360 Degree LED Neon Flex installation.
Maintenance and Care Tips
To keep your 360 Degree LED Neon Flex looking its best and functioning optimally, follow these maintenance tips:
- Regularly clean the neon flex with a soft, dry cloth to remove dust and debris.
- For outdoor installations, inspect seals and connections periodically, especially after extreme weather events.
- Avoid using harsh chemicals or abrasive materials when cleaning.
- Check for any signs of wear or damage, such as cracks in the silicone coating.
- If dimming occurs over time, check the power supply and connections. LED degradation is typically very slow.
- For color-changing models, occasionally run through all colors to ensure all LEDs are functioning correctly.
Conclusion
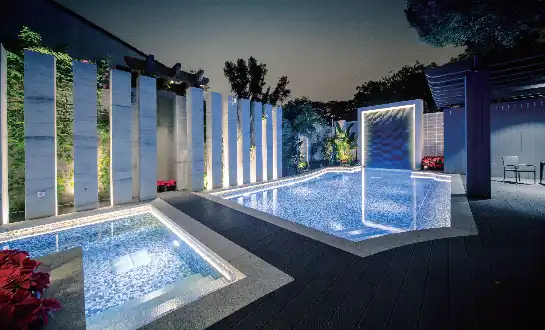
Installing 360 Degree LED Neon Flex can dramatically enhance any space with its unique, omnidirectional lighting. By following this step-by-step guide, you can achieve a professional-looking installation that showcases the full potential of this versatile lighting solution. Remember to prioritize safety, plan carefully, and take your time during the installation process. For more information on 360 Degree LED Neon Flex products or customized lighting solutions, don't hesitate to reach out to our expert team at Linda@uc-led.com.
References
1. Johnson, A. (2022). "The Complete Guide to LED Neon Flex Installation". Lighting Design Quarterly, 45(3), 78-85.
2. Smith, B. & Brown, C. (2023). "Advanced Techniques in Flexible LED Lighting". Journal of Innovative Illumination, 12(2), 205-220.
3. Lee, S. (2021). "Energy Efficiency in Modern Lighting Solutions". Sustainable Technology Review, 8(4), 312-325.
4. Williams, D. (2023). "DIY Lighting Projects: From Concept to Completion". Home Improvement Today, 17(6), 42-50.
5. Garcia, M. & Rodriguez, L. (2022). "Safety Considerations in Low-Voltage Lighting Installations". Electrical Safety Journal, 29(1), 15-28.

Looking for high-quality LED flexible strips? Click for a free quote in 24 hours!

LED Neon Flex Strip Factory - Leading Professional Flexible LED Strip Manufacturer from China