3-Step Guide to Installing Flexible LED Neon Systems
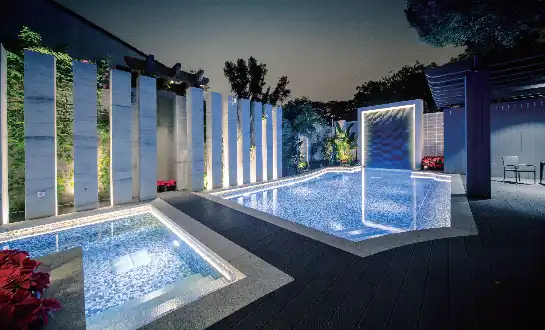
Flexible LED Neon lighting can make any place feel new with bright, changeable lights. This guide breaks the process down into three easy-to-follow steps: planning and preparation, placing, and connecting the power. If you do these things, you can safely and quickly place your Flexible LED Neon. It will look great whether it's indoors or outdoors. This guide will help you feel sure about how to install your lighting system, whether you enjoy doing things yourself or are a professional installer. It will help your lighting system work better and last longer.

Step 1: Planning and Preparation for Your Flexible LED Neon Installation
Before starting the installation, a good plan and preparation are very important for a great Flexible LED Neon setup. This first step makes sure that the installation process goes smoothly and that your lighting system works perfectly after it is installed.
Assessing Your Space and Lighting Needs
Start by carefully looking at the place where you want to put the Flexible LED Neon. Think about the size of the area, the lighting effect you want, and any building features that might affect the installation. The length and type of Flexible LED Neon strip needed, as well as the best hanging places, will all be determined by this measurement.
Measure the area where the bright strips will go, making sure to include corners, curves, and anything else that could get in the way of the strips. It's a good idea to make a thorough drawing of your planned layout. This will help you during the whole installation.
Gathering Necessary Tools and Materials
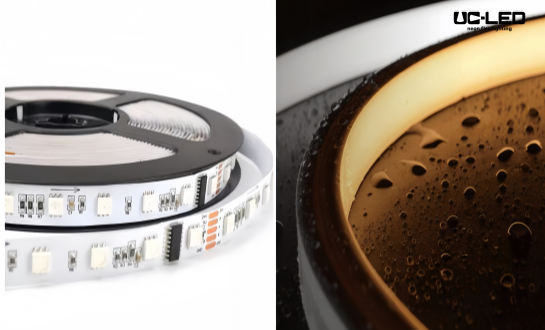
To make sure the repair goes smoothly, get all the tools and supplies you need ahead of time. Flexible LED Neon Strips and a power source that meets the voltage requirements of your LED neon are typical requirements.
- Clips or holes for mounting
- Screws and pegs that work with the surface you're putting on
- A way to cut and strip wire
- Electrical tape or heat shrink tubing
- Silicone sealant for installations that are outside
- A pencil or marker
- A measuring tape
- If you need to mount it, use a drill
- Safety equipment (gloves, safety glasses)
Having these things ready will keep the installation process from being interrupted and help the routine run more smoothly.
Safety Considerations and Precautions
When you work with electricity devices, you should always put safety first. Before you start to put it, make sure the power is off at the circuit breaker. If you don't feel safe doing electrical work, you should call or hire an electrician.
When you are using Flexible LED Neon strips, be aware of how much you can bend them without breaking the parts inside. Always pay attention to how the maker says you should handle the product and its folding radius.
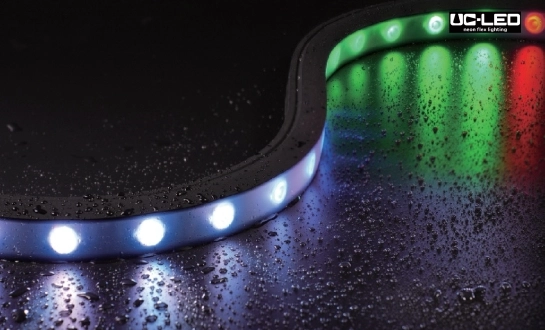
For things that will be outside, you should make sure that they are protected from the weather. Use waterproof connections and seals to prevent wetness entry, and select Flexible LED Neon strips with the proper IP (entry Protection) grade for your location.

Step 2: Mounting Techniques for Flexible LED Neon
The next step is to place your Flexible LED Neon Strips after you have finished planning and getting ready. This very important step needs carefulness and attention to detail to make sure that the work is safe and looks good.
Choosing the Right Mounting Method
Depending on the surface and desired effect, Flexible LED Neon can be fixed in a variety of ways. Some Flexible LED Neon strips have pre-applied adhesive for easy stick-on installation. Other common mounting options include:
- Mounting clips: These provide a secure hold while allowing for easy removal or adjustment.
- Aluminum channels: Ideal for a sleek, professional look and additional protection.
- Adhesive backing: Some Flexible LED Neon strips come with pre-applied adhesive for simple stick-on installation.
Pick the method that works best for your particular surface type and purpose. For areas that aren't even or when something has to be installed outside, fixing clips or channels usually work best for keeping things safe and in place.
Surface Preparation and Marking
For a good mount, the surface must be properly prepared. Clean the area well so that the dust, grease, and any other particles that could affect the bond are removed. For areas that are painted, make sure the paint is completely dried before putting them in place.
Using the layout plan you made before, mark where your Flexible LED Neon will be mounted or where it will go. A laser level can help make sure that the lines are straight and the distance between the fixing places is always the same.
Securing the Flexible LED Neon
When you use fixing clips, make sure they are all spaced evenly along the length of the neon strip, usually every 12 to 18 inches or as the maker suggests. Use the right screws or pegs to make sure the clips are on the surface. The Flexible LED Neon should be gently pressed into place after the channel has been attached to the surface. A lot of channels have a diffuser cover that can be snapped on after fitting to make it look more finished.
If you are using sticky backing, carefully remove the protection layer and press the bright strip into place, working in small areas so that there are no air bubbles or errors. To avoid damaging the internal parts of your Flexible LED Neon at corners or bends, keep in mind the minimum bending radius stated. Some models have cutting lines that you can see, which lets you change them to fit your plan.

Step 3: Electrical Connection and Final Testing
Making the electrical connections and checking the system to make sure everything is working right are the last steps in putting your Flexible LED Neon system.
Power Supply Connection
To begin, put your power supply somewhere that makes it easy to get to for upkeep and near a power source. Make sure the power supply's output voltage and watts are adequate for your Flexible LED Neon Strips. Connect the LED neon's positive and negative wires to the right connections on the power source. You might need to use links or join the lines if your design has more than one piece of neon. To keep voltage drop from happening over long distances, make sure you always use the right size wire for the present load.
Controller Integration (Optional)
Install a color-changing or dimmer switch between the power source and the LED strips if your Flexible LED Neon system includes one. For the right connection and setting of the remote, follow the manufacturer's directions.
Weatherproofing Connections
All electrical lines need to be weatherproofed in places that get wet or are outside. To seal wire joints, you can use silicone-filled wire nuts or heat shrink tubes. To keep water from getting in, put silicone sealant around the places where wires go into mounting holes or junction boxes.
Testing and Troubleshooting
Before finishing up the fitting, do a full test of your Flexible LED Neon system. Turn on the system and make sure that all of the parts are lighting up the right way. Look for dark spots, flashing, or parts that are the wrong color. These might mean there is a link problem or a broken section.
If you run into issues, make sure all the links are right and the power source is working. For RGB or RGBW systems, make sure the controller works correctly by testing all of the color options and changes.
Final Adjustments and Clean-up
Once you are happy with your Flexible LED Neon fitting, make any last changes to the position or fixing. For a clean end look, get rid of any fingerprints or smudges on the bright lines and the areas around them.
Conclusion
Installing Flexible LED Neon systems can make any room feel and look a lot better. This 3-step guide will help you get a professional-looking solution that makes the most of your lighting system. Remember to always follow your area's electricity rules and regulations and keep safety in mind during the whole process. If you want more information about our Flexible LED Neon goods or need help with your lighting project, please email our team at Linda@uc-led.com. Our new, high-quality lighting ideas will help you make your dreams of lights a reality.

source: LED Light
References
1. "LED Lighting: A Primer to Lighting the Future" by Sal Cangeloso (2012)
2. "Practical Lighting Design with LEDs" by Ron Lenk and Carol Lenk (2017)
3. "The LED Lighting Guide" by Javier Fernández Balbuena (2016)
4. "Fundamentals of Lighting" by Susan M. Winchip (2017)
5. "Lighting by Design" by Sally Storey (2017)

Looking for high-quality LED flexible strips? Click for a free quote in 24 hours!

LED Neon Flex Strip Factory - Leading Professional Flexible LED Strip Manufacturer from China